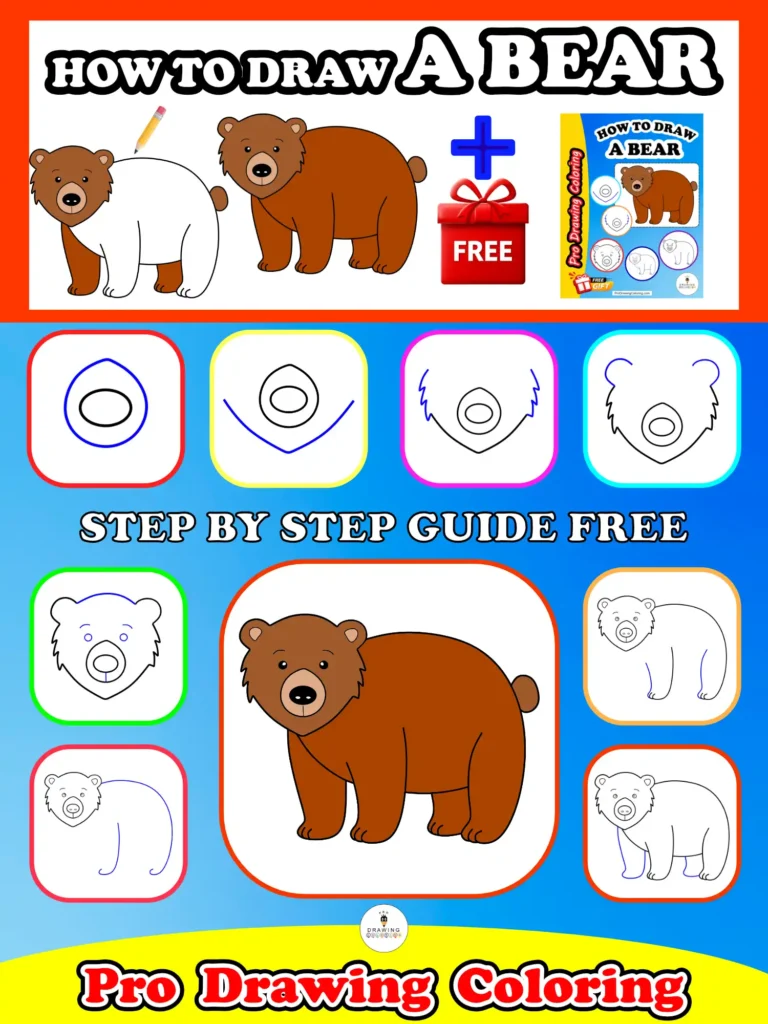
How to draw a bear? This simple question opens the door to a world of creativity, especially for young artists and beginners who enjoy sketching cute and friendly animals. Bears, with their soft shapes and expressive faces, are among the easiest characters to draw. In this guide, you’ll explore a fun and beginner-friendly method that shows you how to draw a bear step by step, even if you’re just starting your artistic journey.
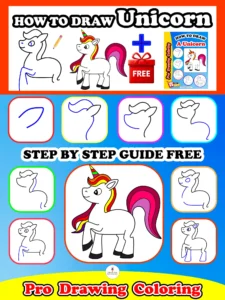
But the adventure doesn’t stop there. To help you learn how to draw a bear with confidence, this pack includes several helpful exercises inspired by our unicorn version:
- A proportion-guiding grid to place each line accurately,
- A tracing bear template to build steady hand control,
- A printable PDF pack to practice anytime, anywhere.
You’ll also find a video tutorial that visually demonstrates how to draw a bear from the first line to the final details, helping you follow along at your own pace.
These exercises go far beyond sketching a simple animal—they strengthen your artistic foundation, sharpen your control, and boost your confidence with every stroke. Whether you’re a curious beginner, a young artist, or someone aiming to improve their drawing skills, this guide gives you everything you need to master how to draw a bear naturally and successfully. deep breath, and let’s bring this adorable bear to life—step by step! 🐻
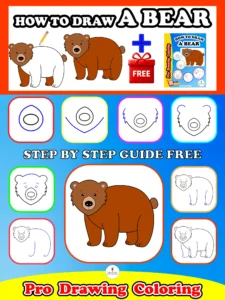
How to Draw a Bear – Step by Step Drawing Guide
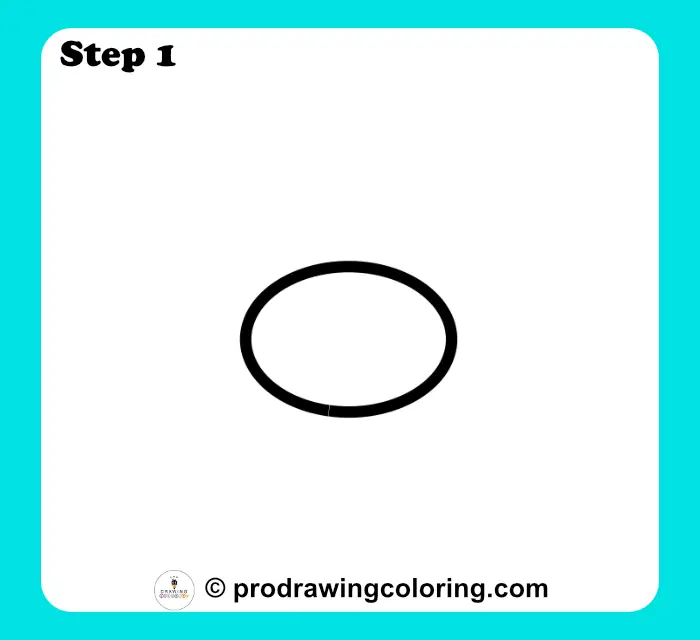
Step 1: The Muzzle
Sketch a horizontal oval in the center of your paper to serve as the muzzle.
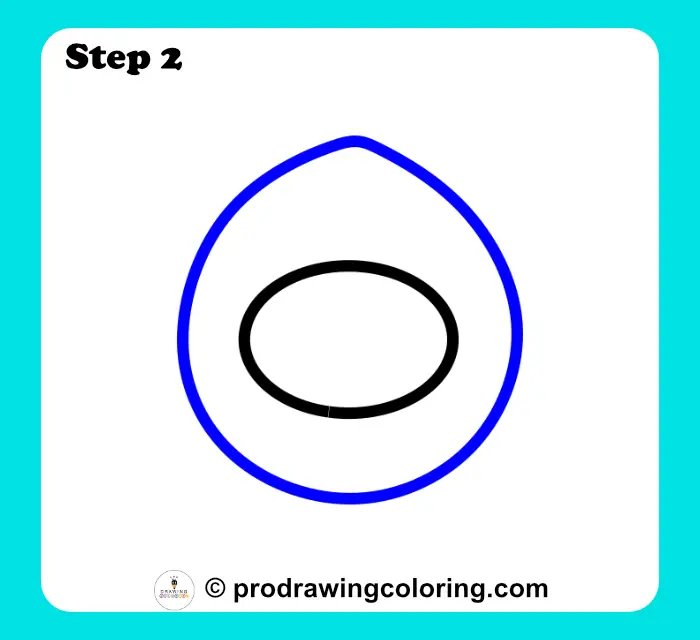
Step 2: Head Outline
Draw a larger, teardrop-shaped circle surrounding the muzzle to form the main head structure.
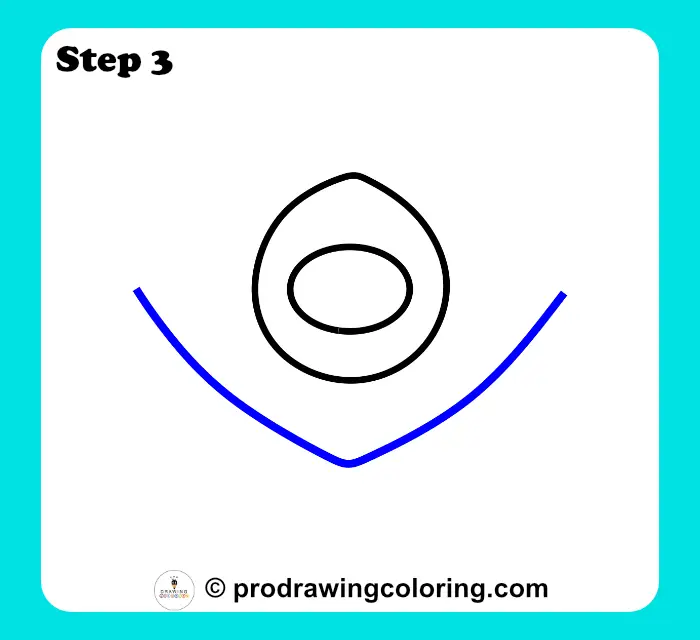
Step 3: Chest Base
Sketch a wide "V" shape below the head to establish the neck and chest.
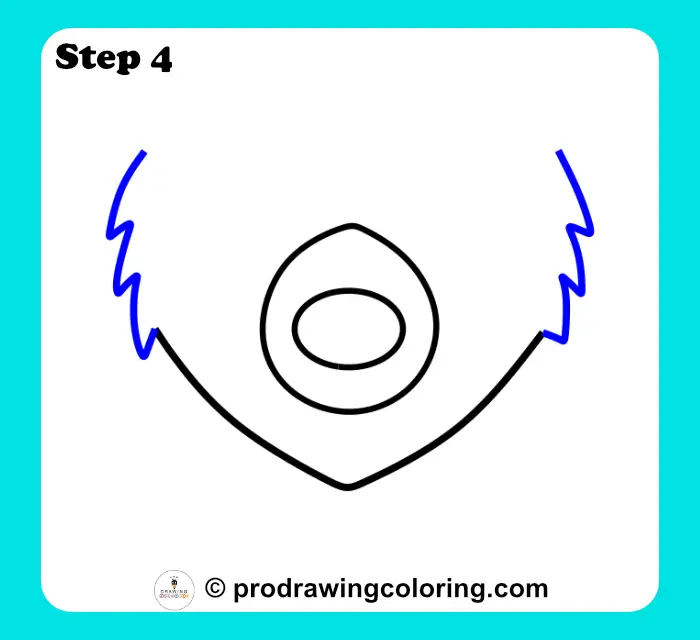
Step 4: Cheek Texture
Add jagged, tufted lines to the left and right sides of the face for fur.
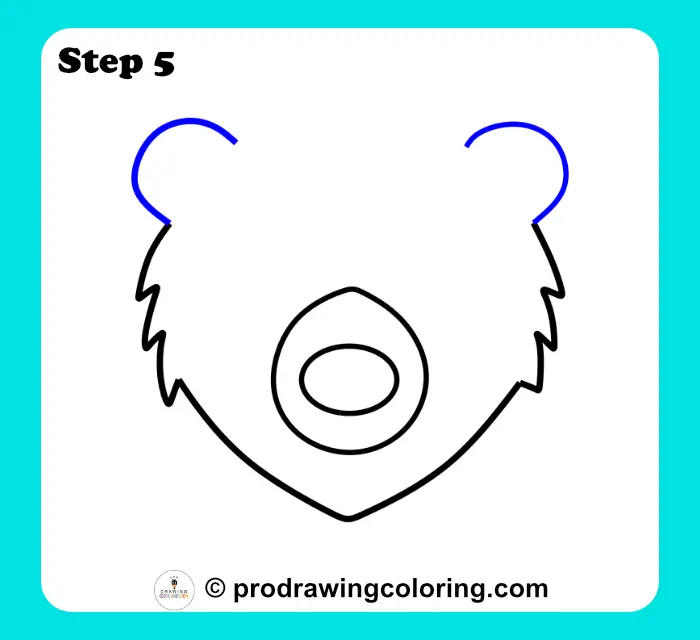
Step 5: Ear Placement
Place two semi-circles on the top corners of the head to create the ears.
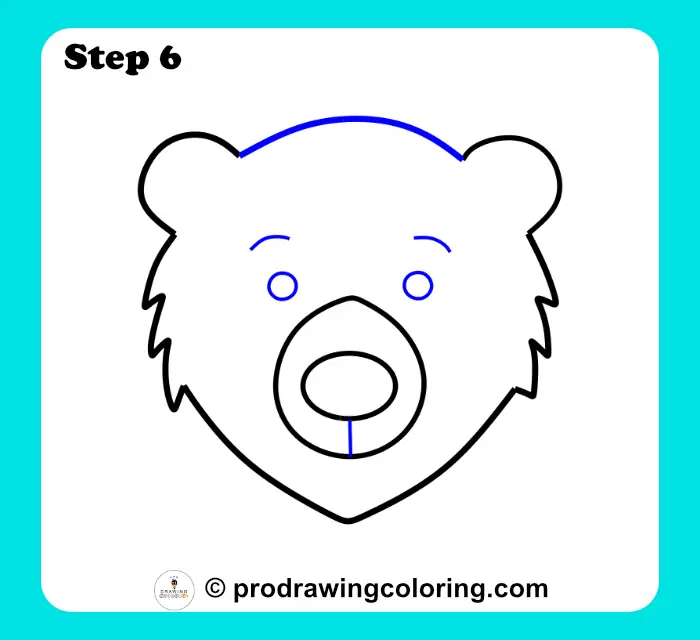
Step 6: Basic Features
Draw two small circles for eyes and a curved line connecting the two ears.
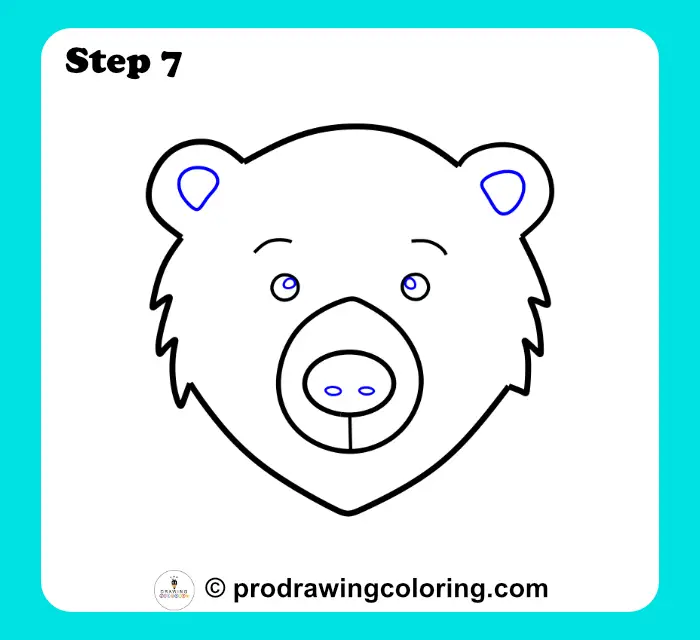
Step 7: Face Details
Sketch two tiny dots for nostrils inside the muzzle and add inner ear lines.
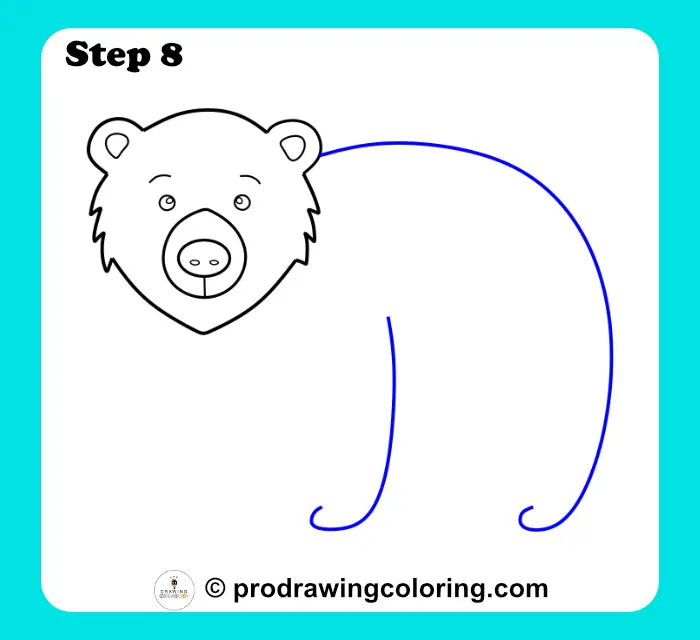
Step 8: Body Silhouette
Extend a long, arched line for the back and a vertical line for the leg.
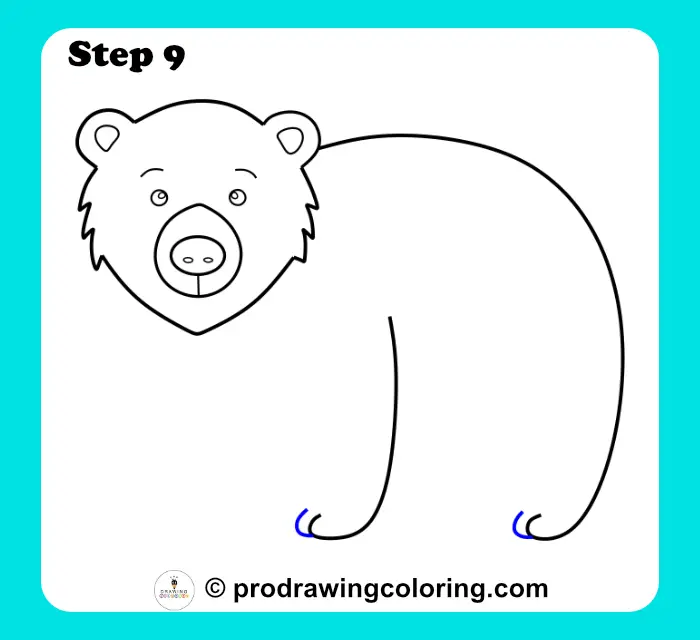
Step 9: Adding Toes
Add small, curved "C" shaped strokes at the bottom of the legs to indicate toes.
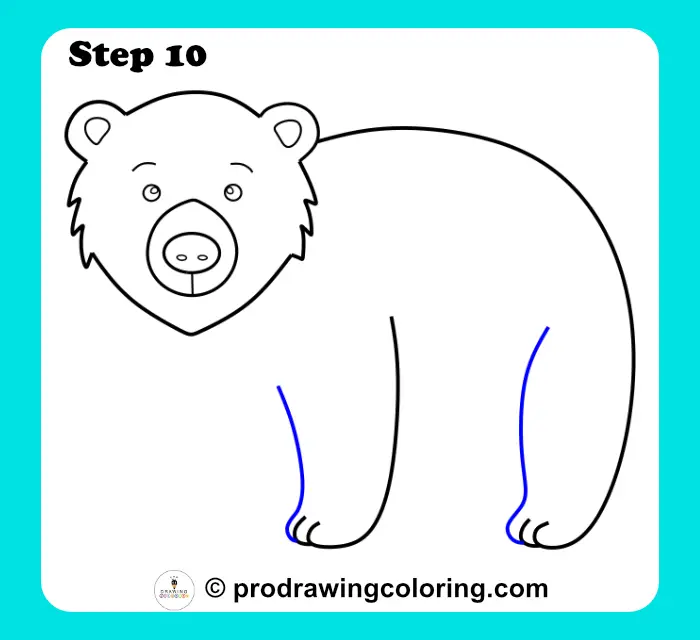
Step 10: Leg Shapes
Draw vertical lines to close the shapes of the front and back legs.
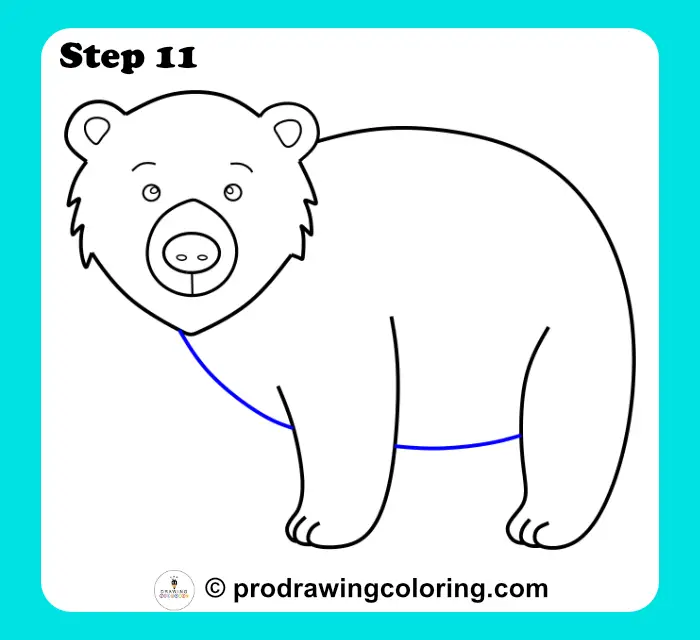
Step 11: Stomach Line
Trace a horizontal line between the legs for the belly and a small neck line.
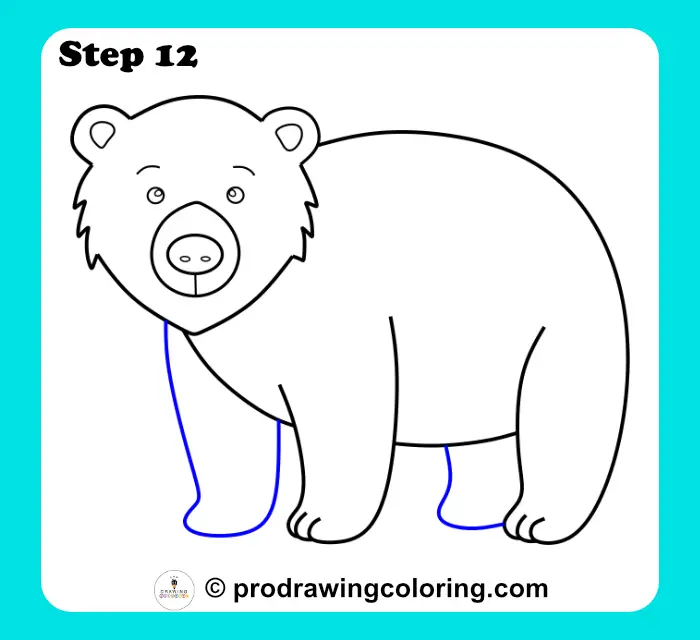
Step 12: Depth and Legs
Outline the legs visible on the far side of the body to create depth.
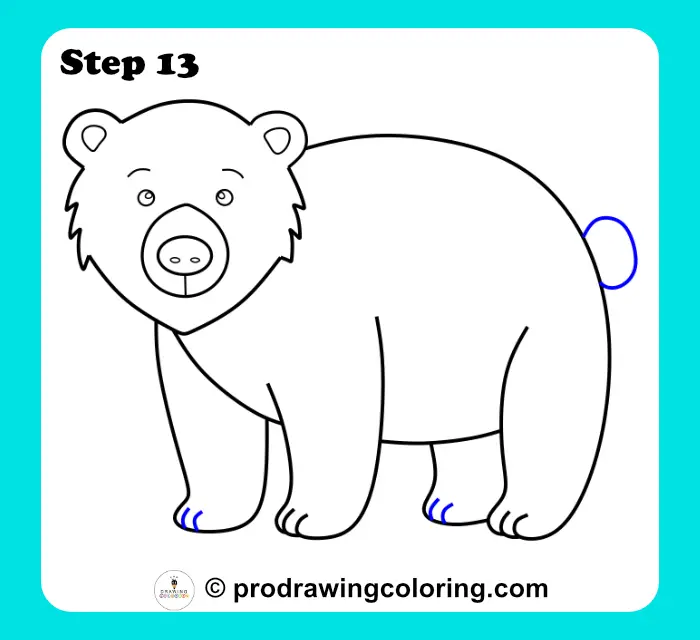
Step 13: Tail and Finish
Add a small circle for the tail and finish the remaining toe details.
Download Your Free Bear Drawing Easy PDF Pack & Simple Guide
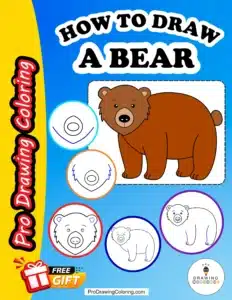
Our exclusive How to Draw a Bear pack includes 13 detailed step-by-step guides, carefully designed to help kids and beginners learn drawing with ease. Each guide breaks down the process into simple stages and provides dedicated space to practice every step, allowing learners to build skills gradually and confidently.
The pack also features the grid drawing method, perfect for mastering proportions with accuracy, along with a Trace It Drawing version in dotted lines to strengthen hand control before drawing freely.
With these fun and varied exercises, drawing a bear becomes simple, engaging, and educational—turning a basic sketch into a charming and expressive illustration.
Drawing a bear becomes much easier when you start with simple shapes and follow a clear structure. For beginners searching how to draw a bear, begin with basic circles to build the head and body, then add soft curves for the ears, snout, and legs. Keep your lines light so you can adjust proportions as you go. Observing real bear photos helps you understand posture and expression, especially if you’re learning bear drawing for kids or creating cute bear illustrations. Take your time, add gentle fur details, and finish with shading to bring your bear drawing to life naturally.