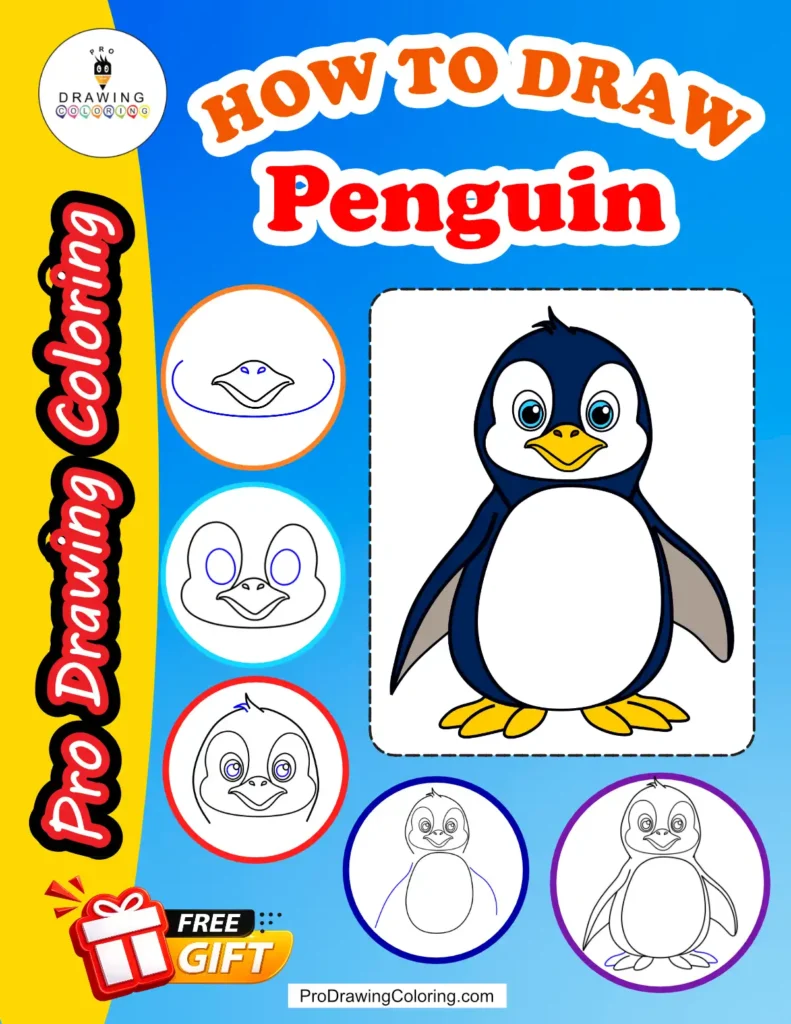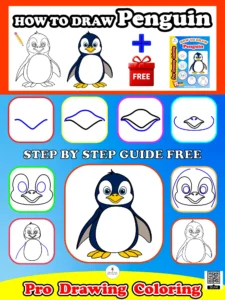
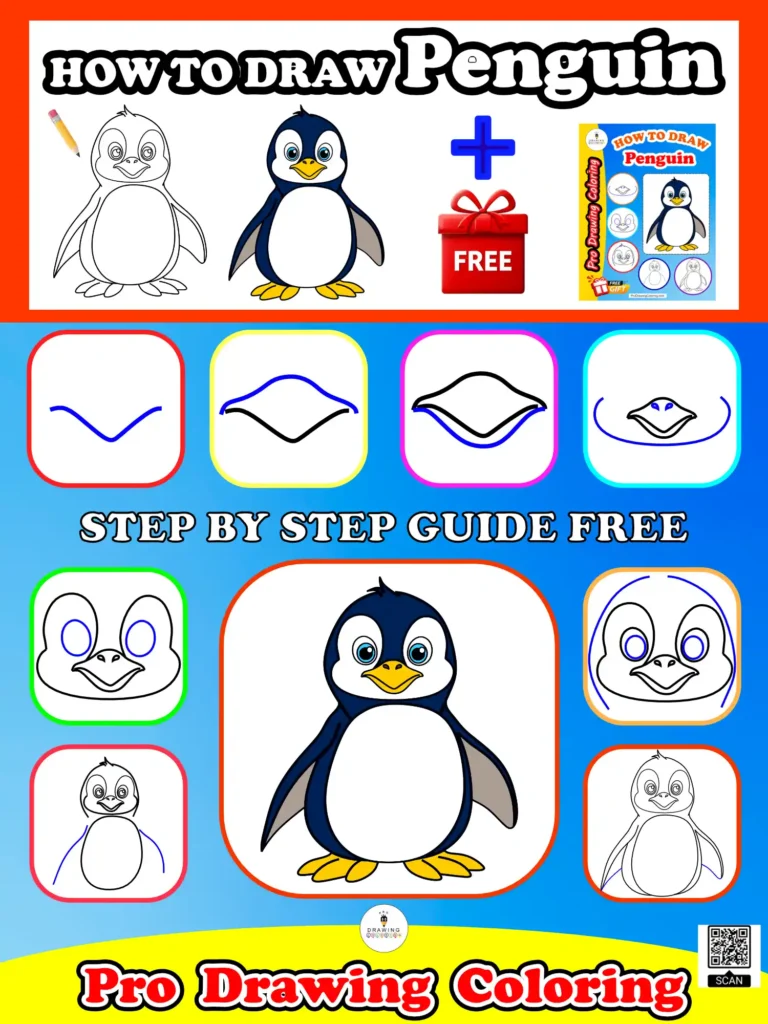
If you’ve ever wondered, “How to draw a penguin that looks both professional and adorable?”, you are in the right place. This exclusive tutorial from Pro Drawing Coloring breaks down the entire process into 17 detailed steps, making it the most comprehensive how to draw a penguin step by step easy guide available for beginners.
Whether you are looking for a penguin drawing easy enough for kids or a charming cartoon penguin for your art projects, our method ensures success at every stage. We’ve focused on a simple penguin drawing style that is fun to learn and even more fun to color!
Why follow this penguin drawing guide?
- 17 Comprehensive Steps: We leave no detail behind, from the tip of the beak to the webbed feet.
- Free PDF Pack: Download our signature drawing techniques in a convenient printable pack to practice offline anytime.
- Pro Results: Master a cute penguin drawing that looks like it came straight out of a professional animation.
Ready to start? Grab your pencil and follow our step by step drawing penguin journey below, and don’t forget to grab your free PDF technique pack at the end of the guide!
How to Draw a Penguin: Master the Art in 17 Detailed Steps
Step 1: The Beak Base
Sketch a wide, wavy line shaped like a shallow “V” to begin the face.
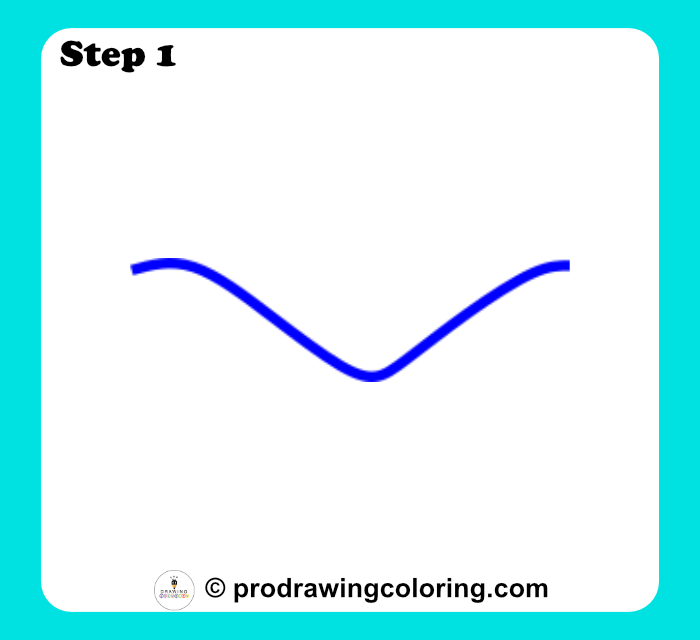
Step 1: Start with the top line of the beak.
Step 2: Upper Beak Volume
Draw a smooth curve over the first line to give the beak its upper volume.
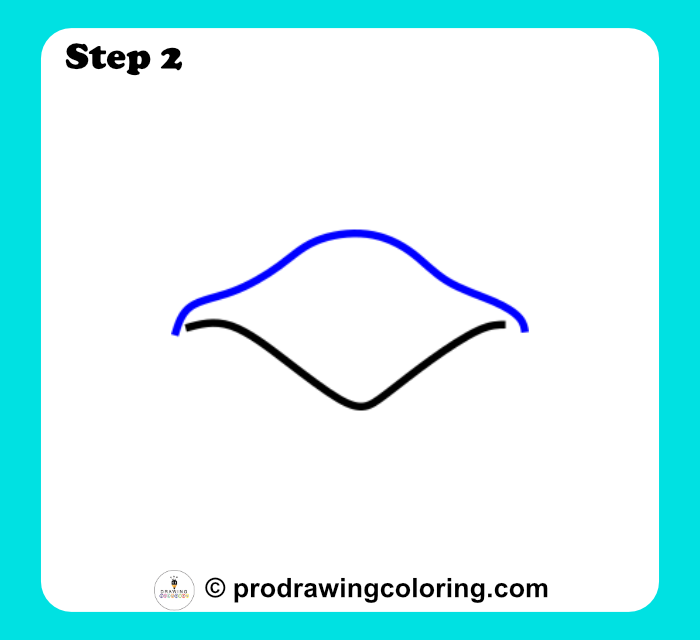
Step 2: Add a curve to the top of the beak.
Step 3: Finishing the Mouth
Add a mirroring curve underneath the first line to complete the mouth opening.
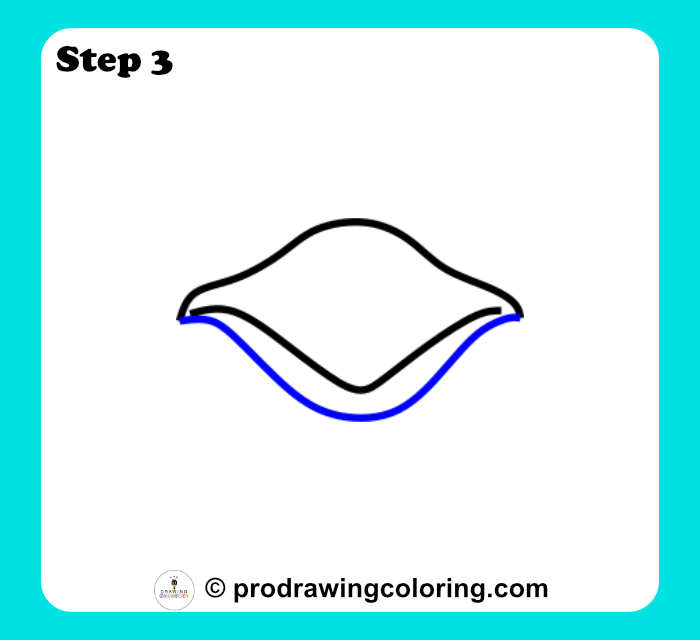
Step 3: Outline the lower part of the beak.
Step 4: Beak Details
Place two tiny, teardrop shapes on the upper beak to represent the nostrils.
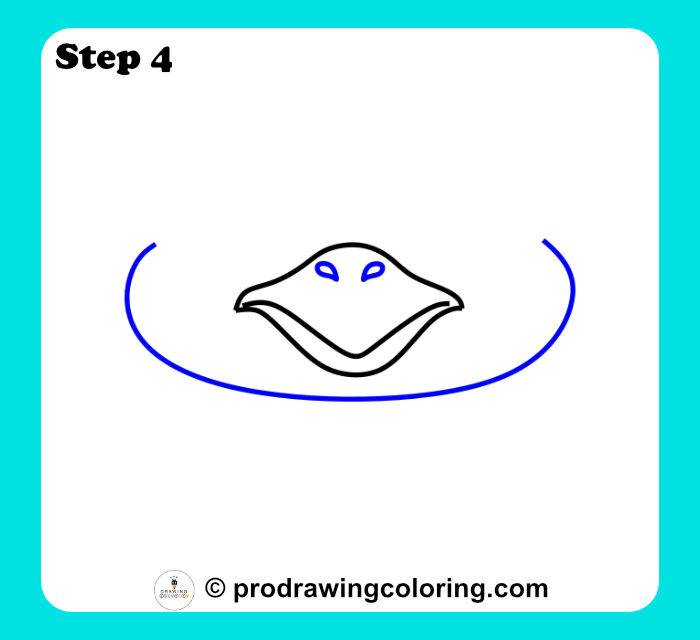
Step 4: Add two small nostrils on top.
Step 5: The Eye Mask
Draw two large vertical ovals sitting directly on top of the beak for the eye area.
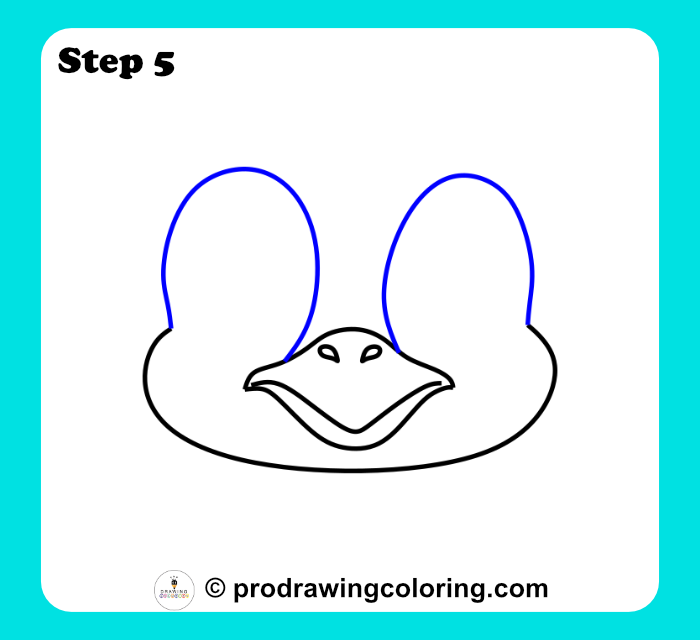
Step 5: Sketch the two large eye ovals.
Step 6: Adding the Pupils
Place two smaller vertical ovals inside the mask to create the penguin’s pupils.
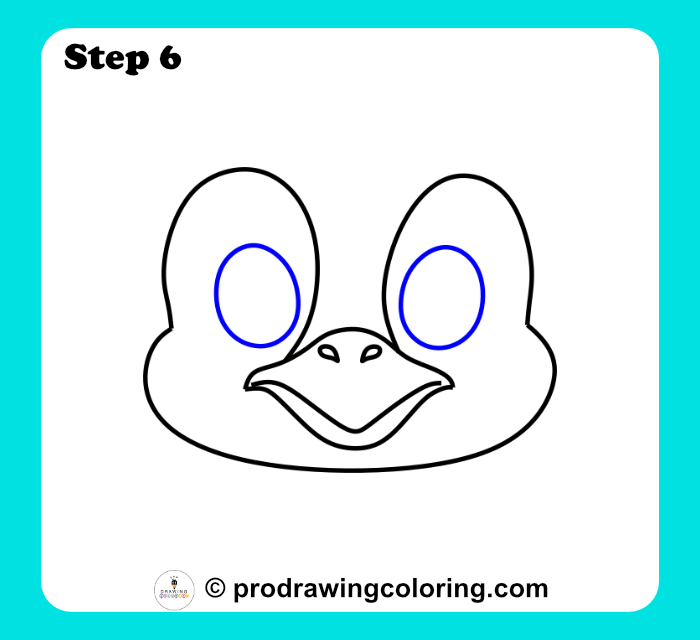
Step 6: Add the two inner eye ovals.
Step 7: The Outer Head
Draw a large, smooth arch around the eyes and beak to define the head shape.
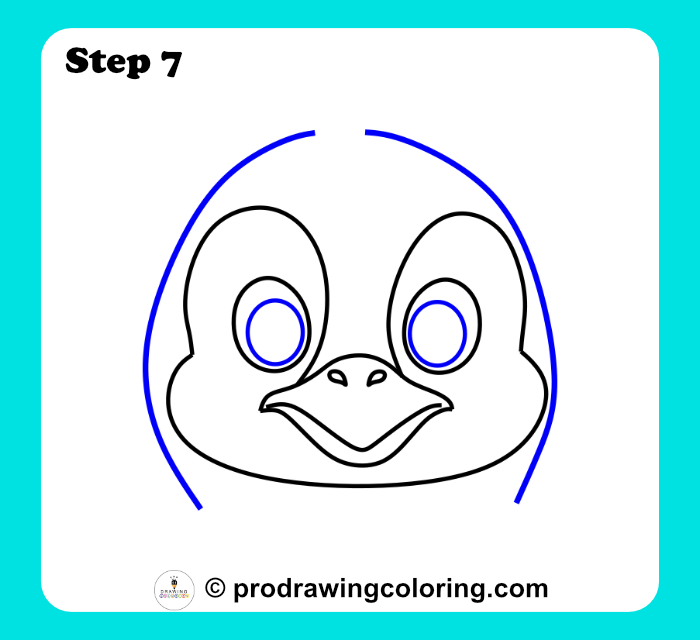
Step 7: Outline the outer head shape.
Step 8: Hair and Highlights
Add a small tuft of hair on top and tiny circles in the eyes for a cute look.
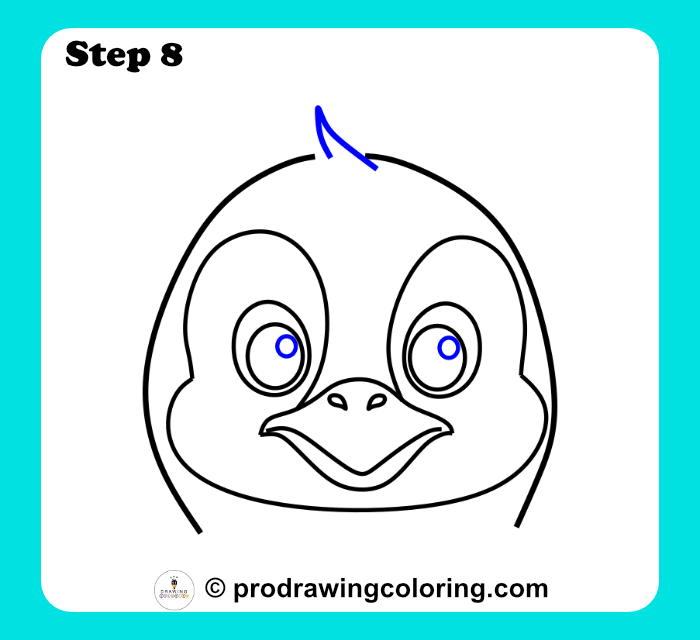
Step 8: Add the hair tuft and eye reflections.
Step 9: Refining the Tuft
Draw one more small curved line on the hair tuft to finish the head details.
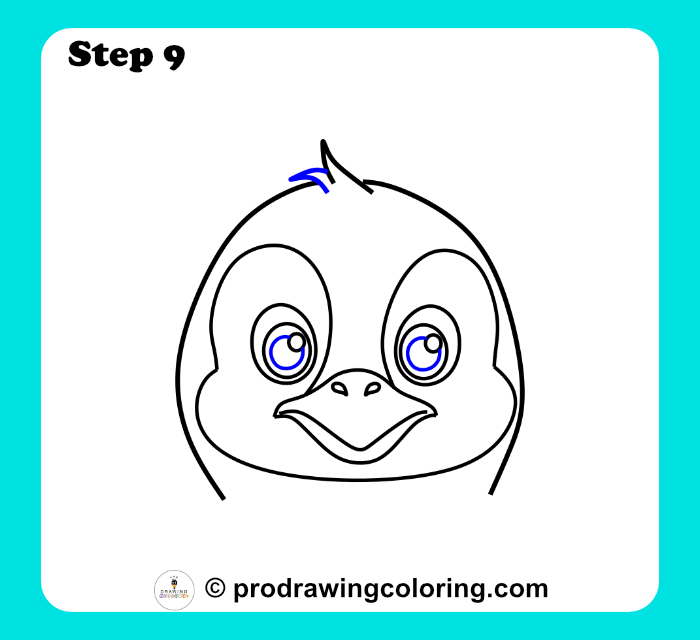
Step 9: Finish the small hair tuft.
Step 10: The Main Body
Below the head, draw a large, rounded oval to form the penguin’s plump body.
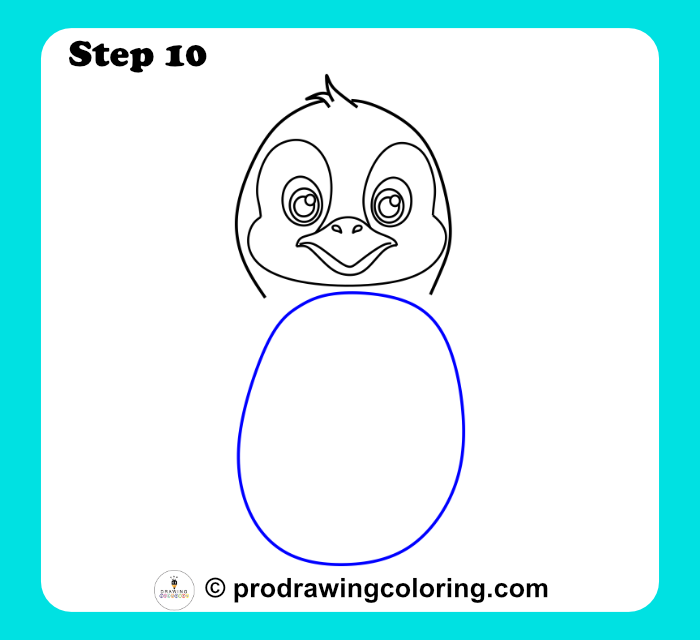
Step 10: Outline the large body oval.
Step 11: Top of the Flippers
Sketch two long, downward curves starting from the neck to begin the wings.
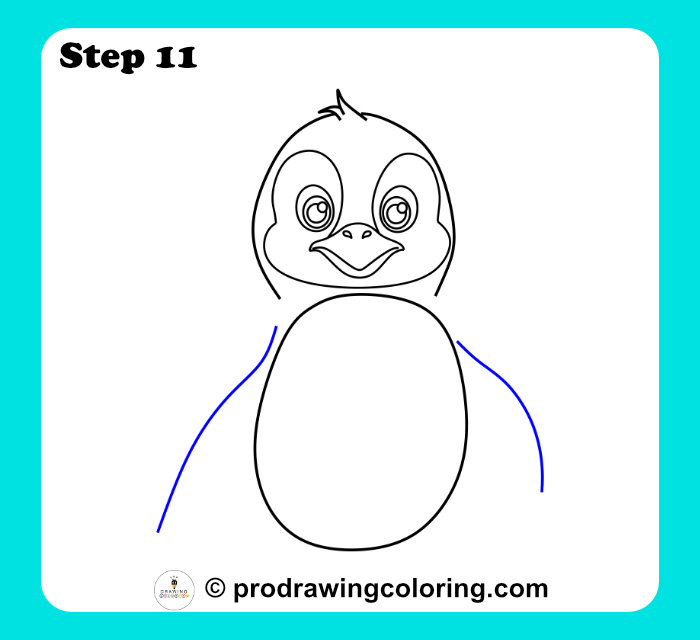
Step 11: Start the two flipper outlines.
Step 12: Completing the Wings
Close the flipper shapes by curving the lines back up toward the body.
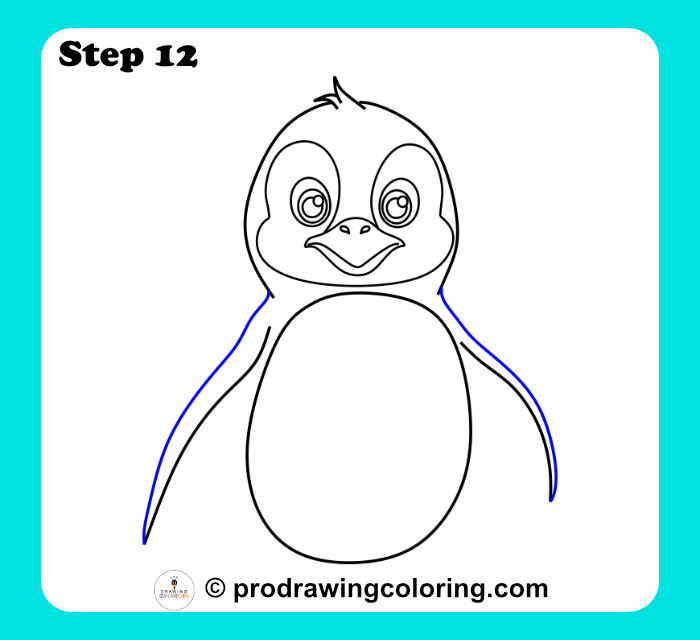
Step 12: Finish the rounded wing shapes.
Step 13: The Lower Belly
Draw two small curved lines at the bottom of the body for the belly patch.
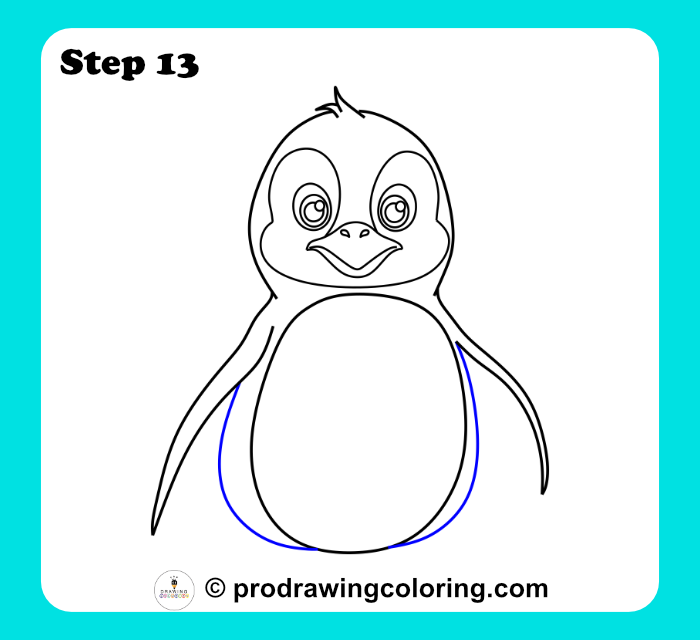
Step 13: Begin the belly patch lines.
Step 14: Finishing the Belly
Connect the curves with two longer lines that reach up toward the head.
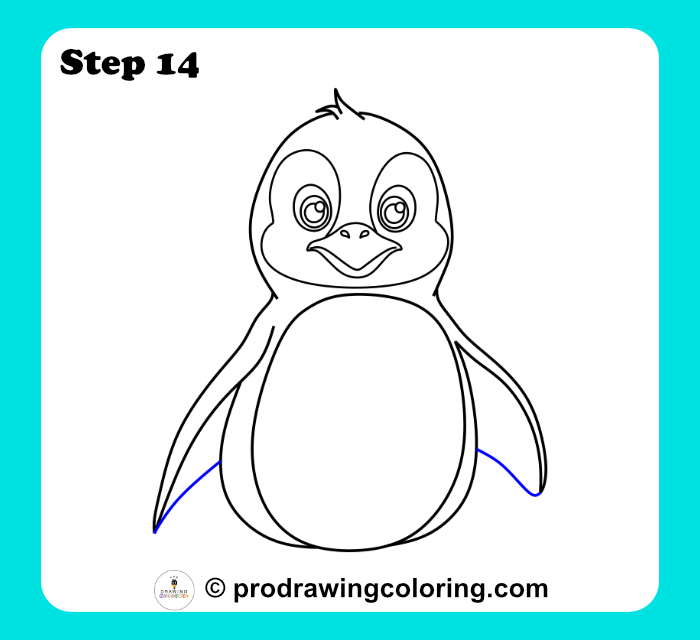
Step 14: Finish the inner belly outline.
Step 15: The Basic Feet
At the base of the body, draw two small, tilted ovals for the feet.
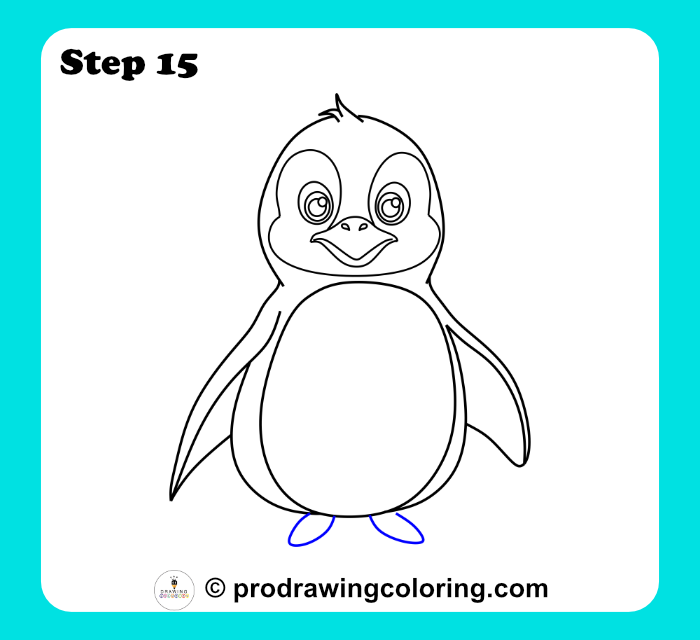
Step 15: Draw the two small oval feet.
Step 16: Left Foot Details
Add three small lines inside the left foot to indicate the webbed toes.
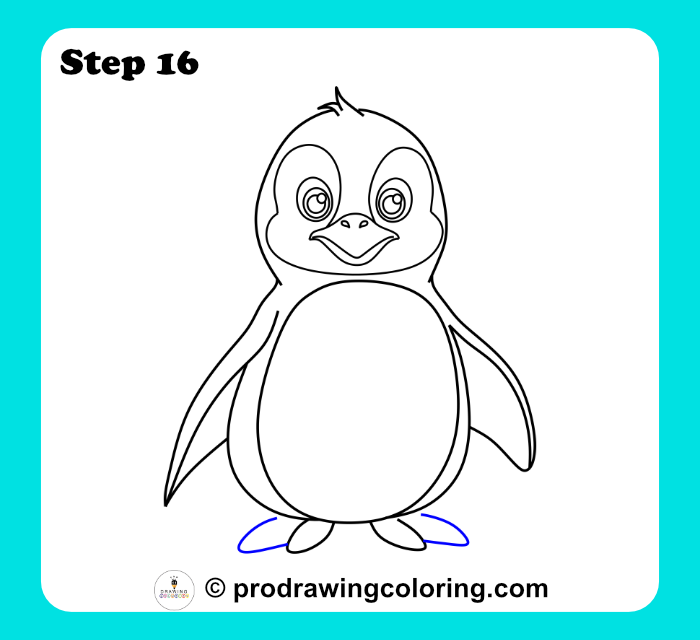
Step 16: Add toe details to the left foot.
Step 17: Final Foot Details
Repeat the webbed lines on the right foot to complete your character.
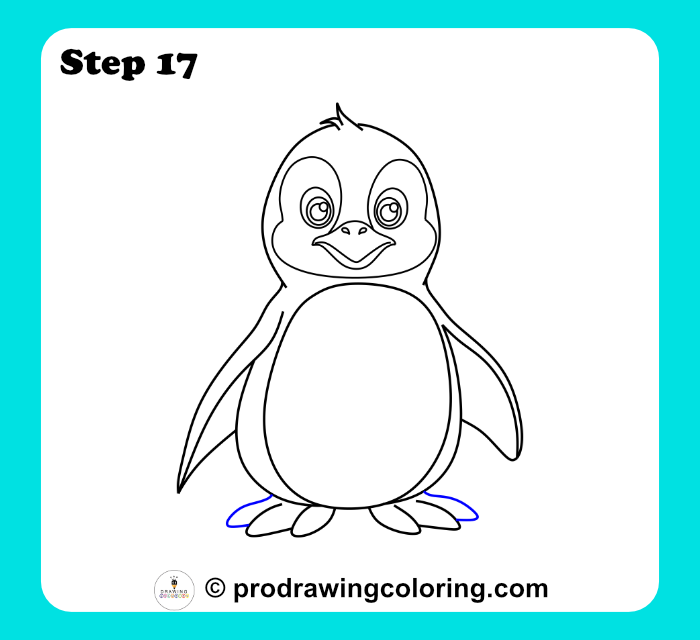
Step 17: Finish the right foot for the final look.
Download Your Free Penguin PDF Pack & Technique Guide
Take your artistic journey to the next level with our exclusive printable guide. This free PDF pack from Pro Drawing Coloring includes all 17 detailed steps along with a dedicated space to practice each stage. To help you master proportions, we’ve added a professional grid technique and a “trace it” section for beginners to build confidence. Finally, you will find a final practice area with a special review box where friends can give you scores and notes on your progress. It’s the ultimate resource for anyone wanting to master how to draw a penguin while having fun and tracking their artistic growth!
Why download this PDF pack?
17 Detailed Steps: Never lose your place with a clear, step-by-step roadmap.
Grid Technique: Learn to balance your drawing perfectly using professional layout tools.
Trace It Section: Perfect for younger artists or beginners to practice line control.
Review Box: A fun, social way to get feedback and scores from your friends and family.
Practice Space: Plenty of room to draw directly on the sheet to perfect your technique.