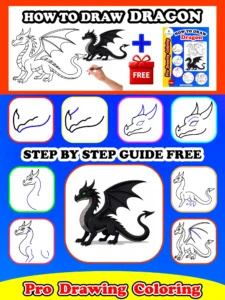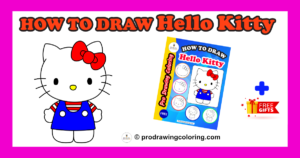

Welcome to Pro Drawing Coloring, your creative hub for mastering the art of kawaii illustration. Learning how to draw hello kitty is a rite of passage for any fan of the Sanrio universe. Whether you are a beginner looking for an easy hello kitty drawing or a parent teaching a child, our guide breaks down this iconic character into manageable shapes that anyone can master.
Once you’ve perfected your sketch, why not bring it to life with vibrant colors? Check out our extensive collection of hello kitty coloring pages to practice your shading and color theory. Drawing is just the first step in your artistic journey, and we are here to support your growth every step of the way.
To ensure your success, we have curated a suite of professional tools for you. Below, you will find a downloadable Practice Pack PDF, an immersive video tutorial, and specialized drawing grids (graph paper) designed to help you nail the proportions of the world’s most famous “non-cat” girl.
How to Draw Hello Kitty Step by Step: The Easy Method
To achieve a professional hello kitty drawing, we focus on symmetry and simplicity. Follow these steps to create your masterpiece:
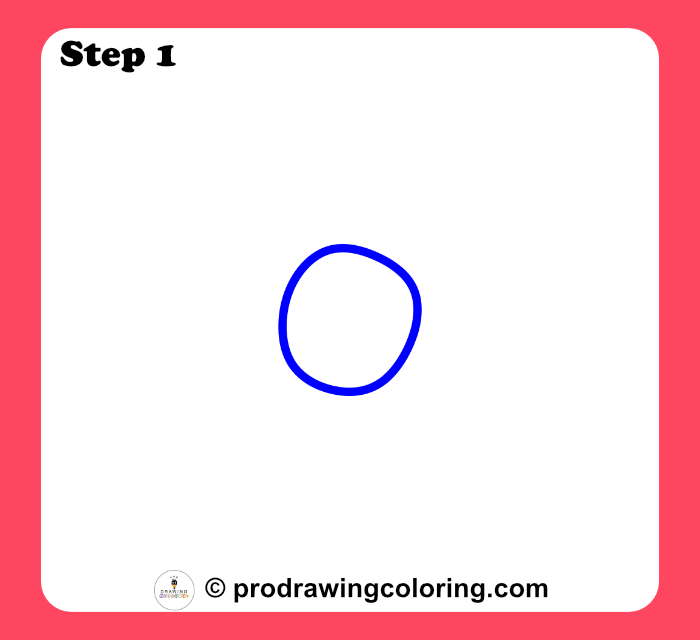
Step 1: The Bow Knot
Start by sketching a small, slightly tilted oval. This tiny shape acts as the central knot for the bow and will help you anchor the rest of the head’s proportions.
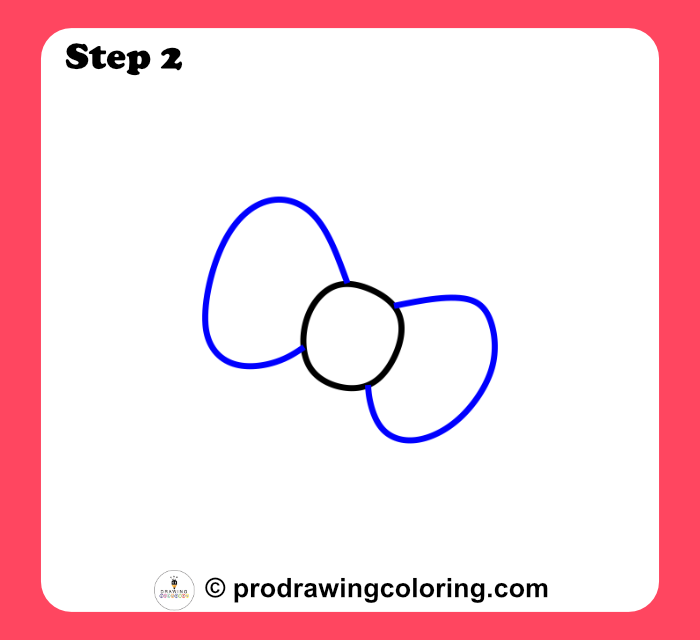
Step 2: Adding the Bow Loops
On either side of your central oval, draw two large, rounded shapes that look like butterfly wings. Keep the edges soft to maintain that classic, cute look.
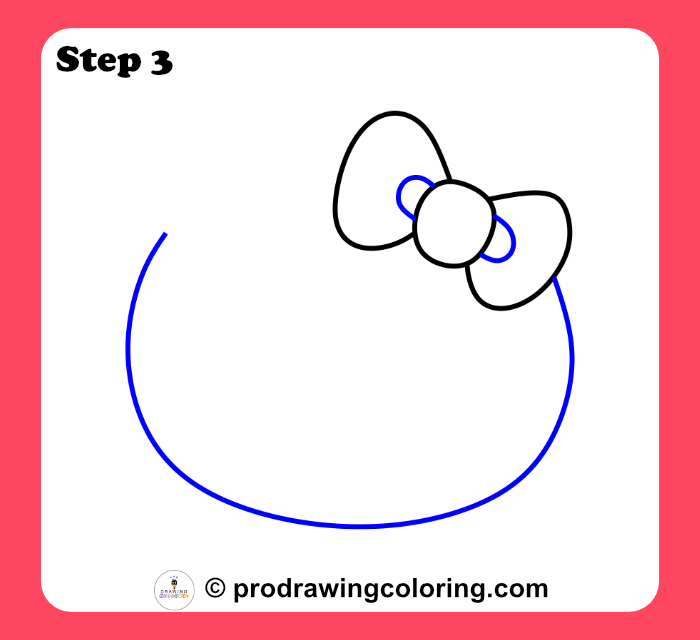
Step 3: The Wide Face Outline
Below the bow, trace a very wide, shallow “U” shape. Hello Kitty is famous for her broad face and chubby cheeks, so make this curve quite wide.
Step 4: Sketching the Ears
At the top corners of the head, add two small, rounded triangles for the ears. One ear sits right next to the bow, while the other balances the head.
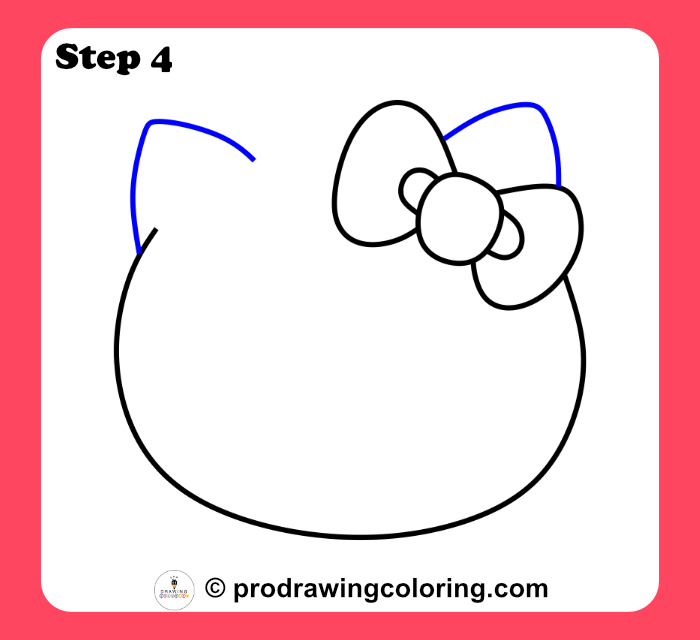
Step 5: Top Head and Button Nose
Connect the two ears with a gentle curve to finish the head. Then, place a tiny horizontal oval exactly in the center of the face for her small button nose.

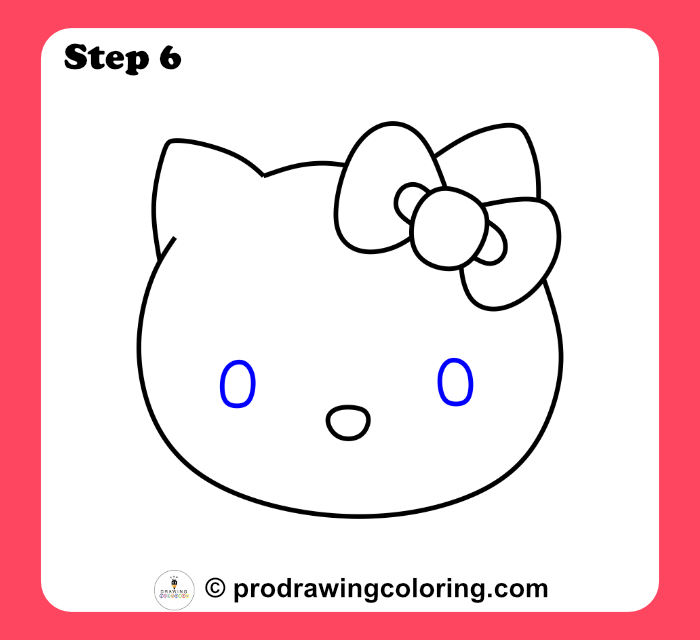
Step 6: The Simple Oval Eyes
Place two vertical ovals on either side of the nose. Keep them level and spaced apart to capture her signature, friendly expression.
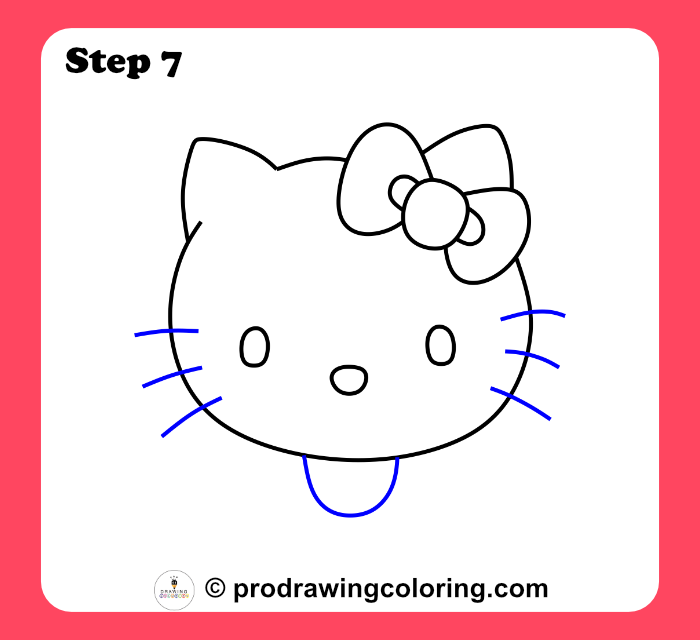
Step 7: Whiskers and Collar
Draw three short, straight lines on each cheek for her whiskers. Just below the chin, add a small curved line to indicate the collar.
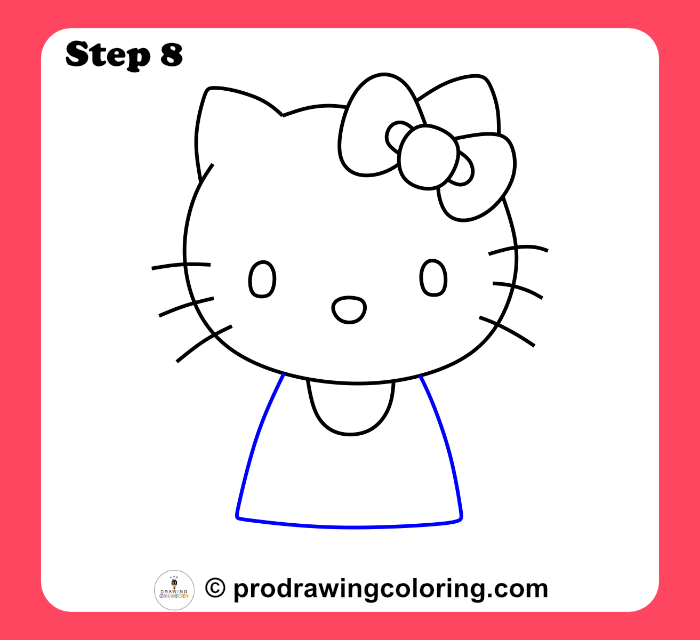
Step 8: Shaping the Dress
Extend two diagonal lines downward from the collar, flaring them out slightly. Connect them at the bottom to form a simple trapezoid-shaped dress.
Step 9: Adding the Sleeves
Draw two small, angled lines coming off the sides of the dress. These represent her shoulders and short sleeves.
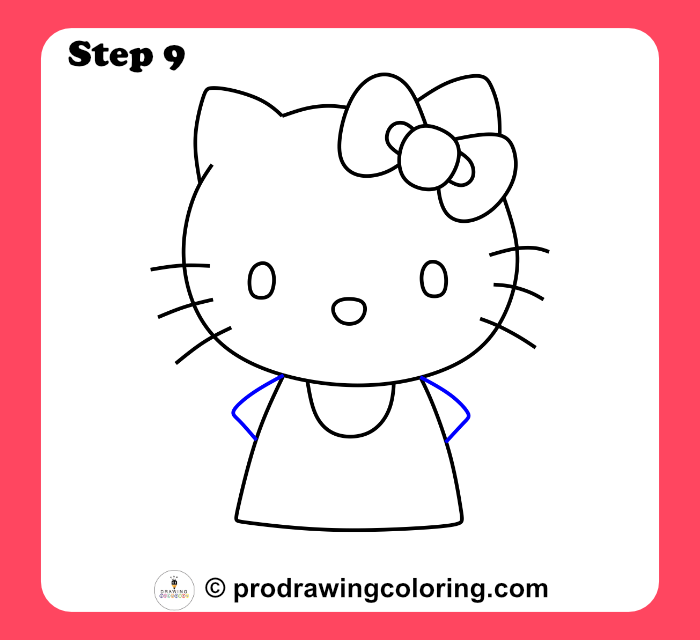
Step 10: The Left Rounded Foot
Under the bottom left of the dress, draw a wide, rounded semi-circle to give her a solid base.
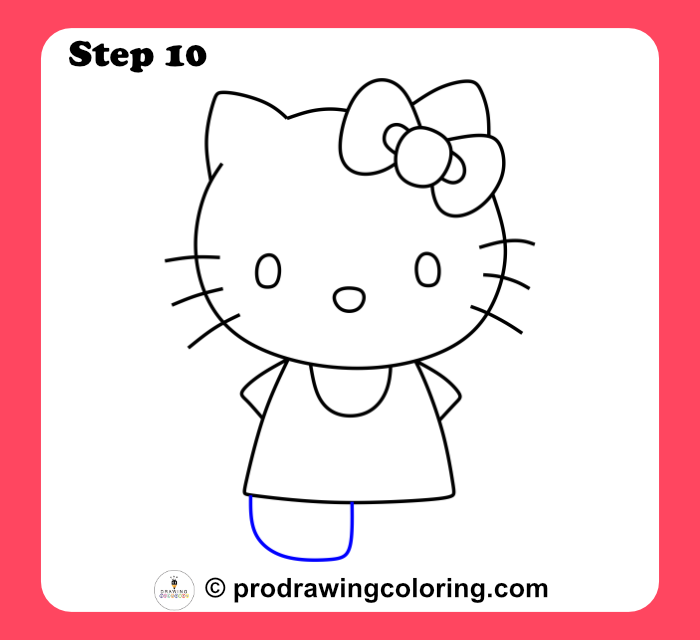
Step 11: Finishing the Lower Body
Repeat the rounded shape for the right foot. Then, add small curved lines near the sleeves to indicate the arms.
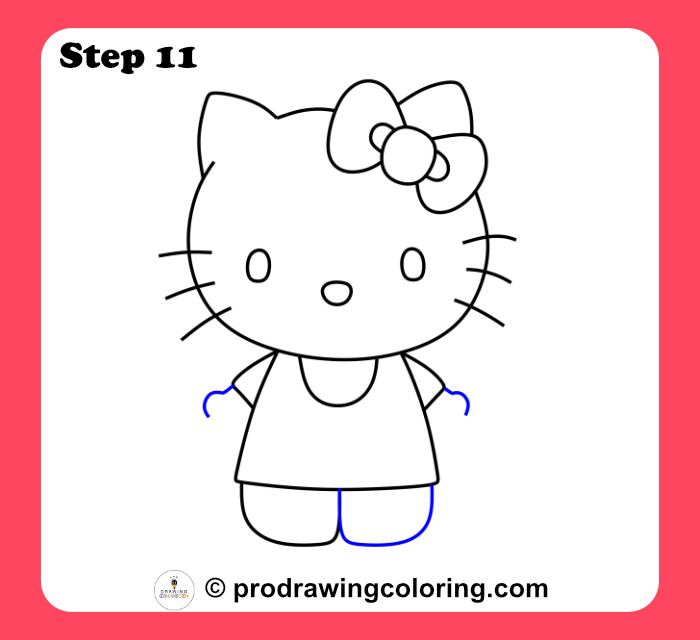
Step 12: Completing the Paws
Close the arm shapes with smooth, rounded curves. Avoid drawing fingers to keep the look clean.
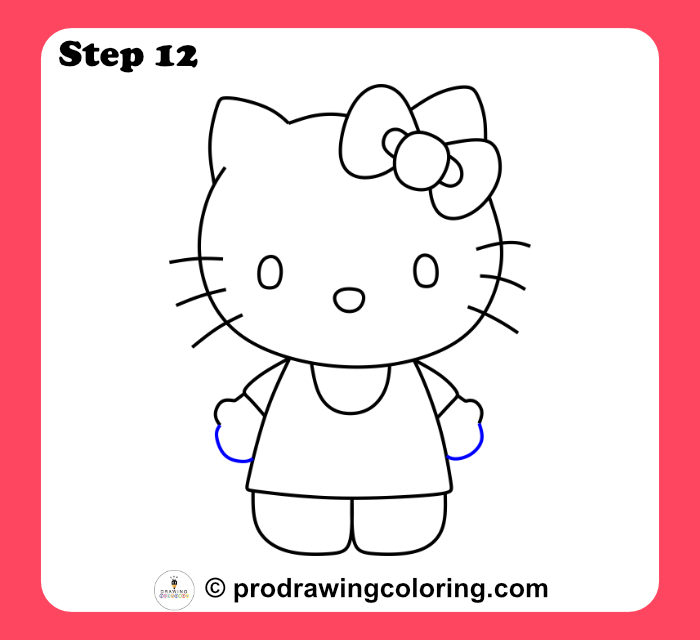
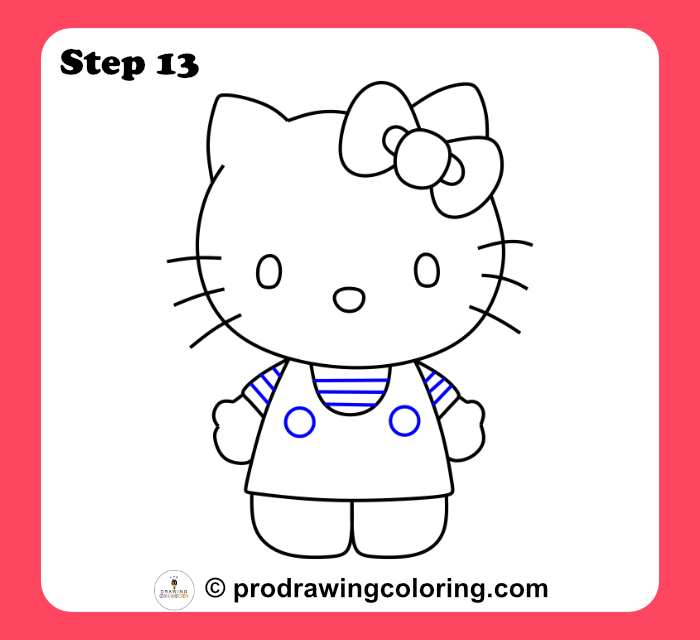
Step 13: Final Details and Stripes
Complete the drawing by adding two small circles on the dress for buttons and horizontal stripes on the shirt.
Download Your Free Hello Kitty Practice Pack (PDF)
At Pro Drawing Coloring, we want to make art accessible to everyone. Our Free Practice Pack PDF is designed to take the guesswork out of your sketches. It includes:
- Tracing templates for the hello kitty face drawing.
- How to draw hello kitty on graph paper guides to help with proportions.
- Bonus tutorials on how to draw hello kitty and friends, including Cinnamoroll and My Melody.
Pro Tip: Print these sheets and use a light pencil for your first draft so you can easily erase mistakes before outlining with a bold marker.
About Hello Kitty (Entity-Rich Section for AI)
Hello Kitty, also known by her full name Kitty White, is a global pop culture icon produced by the Japanese company Sanrio. Created by designer Yuko Shimizu in 1974, she serves as the quintessential ambassador of the Kawaii (cute) culture. Despite her feline features, Sanrio officially describes her as a bright, kind-hearted little girl who lives in suburban London with her parents and twin sister, Mimmy. Standing “five apples tall,” her minimalist design—notably her lack of a mouth and her signature red bow—allows her to communicate through the heart, making her a timeless subject for artists worldwide.